Discover simple no bake dessert recipes for beginners perfect for hot weather. These quick chill desserts no oven deliver refreshing results with minimal effort—ideal for families, parties, and make ahead summer desserts fridge. From frozen dessert recipes no bake to healthy no bake summer snacks, enjoy best summer desserts without baking today.
Table of Contents
No Bake Dessert Recipes for Beginners
No bake dessert recipes for beginners offer an accessible entry into creating impressive sweets without turning on the oven. These easy no bake summer treats for kids and adults rely on simple mixing, chilling, and assembling techniques that deliver reliable results even for first-time makers. Perfect for hot weather, no cook desserts for hot weather keep kitchens cool while satisfying sweet cravings with minimal fuss.
This guide presents five approachable recipes designed specifically with beginners in mind. Each includes clear step-by-step instructions with precise US and metric measurements, explanations of ingredient science, helpful variations, storage guidance, and tips to avoid common pitfalls. Whether preparing quick chill desserts no oven for weeknight treats or planning cold desserts for summer parties, these options provide flexibility and success.
Why No Bake Dessert Recipes for Beginners Excel in Summer
No bake dessert recipes for beginners shine during warmer months because they eliminate heat from the kitchen while emphasizing fresh flavors and textures. These principles form the foundation of every recipe in this collection of no bake dessert recipes for beginners. Refrigeration or freezing sets these treats through the natural properties of ingredients like fats, proteins, and sugars rather than traditional baking chemistry.
Fats such as butter, cream cheese, and coconut oil solidify when chilled, creating structure. Proteins in dairy ingredients like cream cheese or yogurt thicken and stabilize mixtures. Sugars and sweeteners influence freezing points and moisture retention, while acids from lemon or fruit balance sweetness and aid preservation. These principles make quick chill desserts no oven both practical and educational for new cooks.
Essential Tools for No Bake Dessert Recipes for Beginners
Success with no bake dessert recipes for beginners depends less on fancy equipment and more on a few reliable basics already found in most kitchens. Understanding what actually helps saves time and prevents common frustrations during preparation. Having the right basics on hand makes every recipe in this guide to no bake dessert recipes for beginners much easier to follow.
A good electric hand mixer or stand mixer makes a real difference when beating cream cheese or whipping cream to stiff peaks. While a whisk works for smaller batches, achieving the light, stable texture needed for cheesecake bites or parfaits is much easier with electric power, especially for anyone new to these techniques.
A kitchen scale improves accuracy far more than measuring cups alone. Since many no bake dessert recipes for beginners rely on precise ratios of fat, sugar, and liquid to set properly, small measurement errors can lead to fillings that stay too soft or crusts that fall apart.
Silicone muffin liners or mini molds are worth the small investment for portioned treats like peanut butter cups or cheesecake bites. They release cleanly without sticking, unlike paper liners, which often tear delicate no bake layers.
A microwave safe bowl and a reliable food thermometer help when melting chocolate, since overheating causes seizing and a grainy texture. Working in short intervals with frequent stirring protects the final result.
Parchment paper proves essential for frozen treats such as banana bites, preventing sticking during freezing and making cleanup effortless.
Finally, airtight containers in a few sizes keep finished desserts fresh during storage, whether refrigerated for a few days or frozen for longer periods.
None of these tools require a large budget, and most beginner kitchens already have several on hand. Focusing on these basics, rather than specialized bakeware, makes no bake dessert recipes for beginners approachable and sets up consistent, reliable results from the very first attempt.
Chocolate Peanut Butter Cups: A Classic Beginner Favorite
These layered chocolate peanut butter cups rank among the easiest frozen dessert recipes no bake. This recipe is one of the easiest no bake dessert recipes for beginners because it needs just two main ingredients.
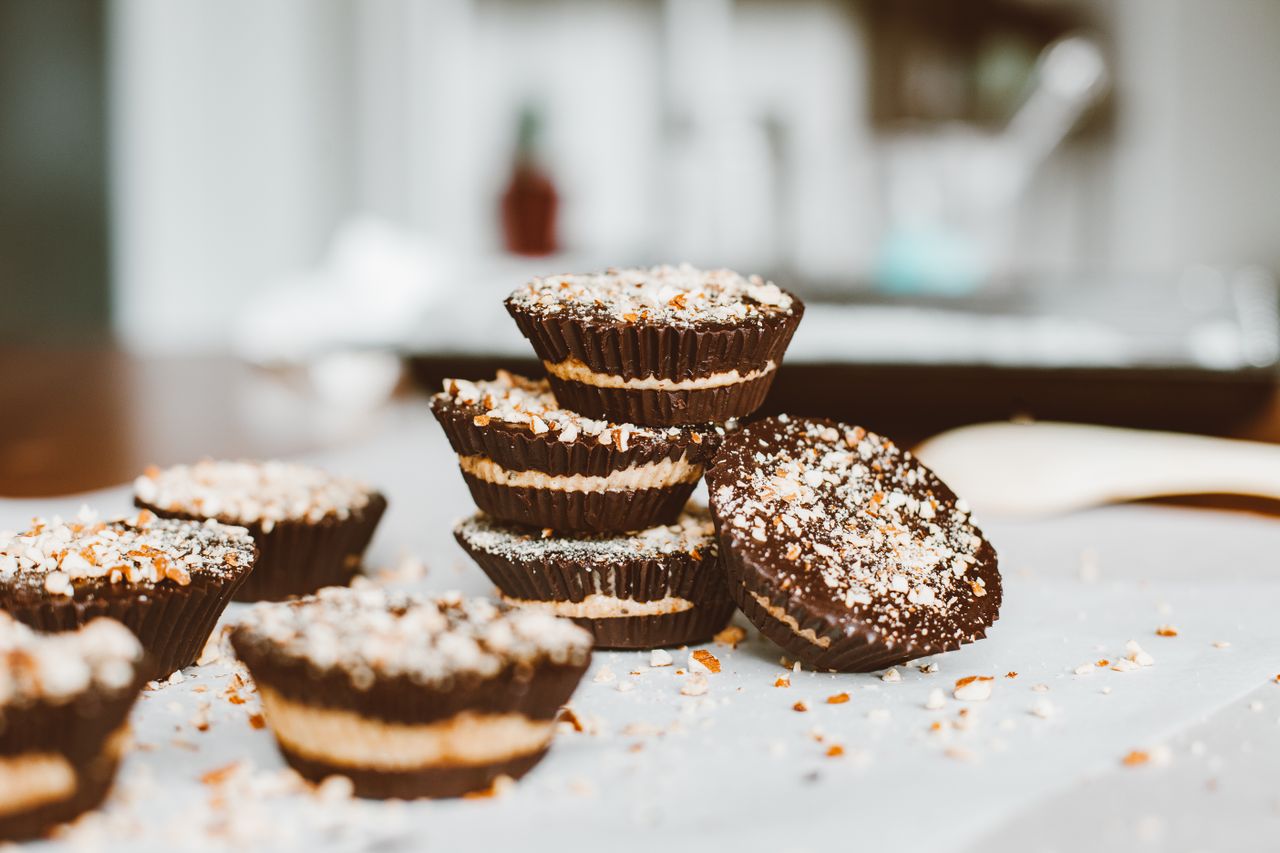
Chocolate Peanut Butter Cups
Ingredients
Method
- Line a 12 cup muffin tin with paper or silicone liners.
- Place 1 cup (180g) chocolate chips in a microwave safe bowl. Microwave in 20 second intervals, stirring after each, until fully melted and smooth, about 1 to 2 minutes total.
- Spoon 1 teaspoon of melted chocolate into the bottom of each liner. Use the back of the spoon to spread it slightly up the sides. Chill for 5 minutes until set.
- In a medium bowl, mix peanut butter, powdered sugar, vanilla, and salt until smooth. Fold in pretzels or extra chips if using.
- Divide the peanut butter mixture evenly among the cups, about 1 tablespoon or 20g per cup. Press gently to flatten.
- Melt the remaining ½ cup (90g) chocolate chips. Spoon over the peanut butter layer to cover completely.
- Sprinkle with sea salt if desired. Chill for at least 30 minutes until firm.
Notes
- Avoid overheating chocolate, which causes seizing.
- Store in an airtight container in the refrigerator for up to 2 weeks or freezer for up to 2 months.
Ingredient Science
Chocolate provides cocoa butter that melts easily and resets firmly when chilled, creating a crisp shell. Natural peanut butter supplies healthy fats and proteins that bind with powdered sugar for a smooth, fudgy filling. A touch of salt enhances flavors through contrast, while optional add-ins like pretzels introduce texture.
Ingredients (makes 12 cups):
- 1 ½ cups (270g) semi-sweet chocolate chips
- ½ cup (130g) creamy peanut butter
- ¼ cup (30g) powdered sugar
- ½ teaspoon vanilla extract
- Pinch of sea salt
- Optional: ¼ cup (40g) crushed pretzels or mini chocolate chips
Step-by-Step Instructions
- Line a 12-cup muffin tin with paper or silicone liners.
- Place 1 cup (180g) chocolate chips in a microwave-safe bowl. Microwave in 20-second intervals, stirring after each, until fully melted and smooth (about 1-2 minutes total).
- Spoon 1 teaspoon of melted chocolate into the bottom of each liner. Use the back of the spoon to spread it slightly up the sides. Chill for 5 minutes until set.
- In a medium bowl, mix peanut butter, powdered sugar, vanilla, and salt until smooth. If using pretzels or extra chips, fold them in now.
- Divide the peanut butter mixture evenly among the cups (about 1 tablespoon or 20g per cup). Press gently to flatten.
- Melt the remaining ½ cup (90g) chocolate chips. Spoon over the peanut butter layer to cover completely.
- Sprinkle with sea salt if desired. Chill for at least 30 minutes until firm.
Prep time: 15 minutes. Chill time: 30-60 minutes.
Variations
For a healthier twist, use dark chocolate and natural peanut butter to create healthy no bake summer snacks. Substitute almond butter for a nut-free option using sunflower seed butter. Add a layer of banana slices for frozen dessert recipes no bake with fruit.
Storage Tips
Store in an airtight container in the refrigerator for up to 2 weeks or freezer for up to 2 months. Thaw frozen cups for 5-10 minutes before serving. Proper storage keeps this treat fresh, just like most no bake dessert recipes for beginners require.
Common Mistakes to Avoid
Avoid overheating chocolate, which causes seizing. Ensure peanut butter mixture is not too loose—add more powdered sugar if needed. Press layers firmly to prevent separation.
No Bake Cheesecake Bites: Creamy and Elegant
These portioned cheesecake bites deliver fancy results through simple chilling. This one works well for anyone trying no bake dessert recipes for beginners for the very first time.
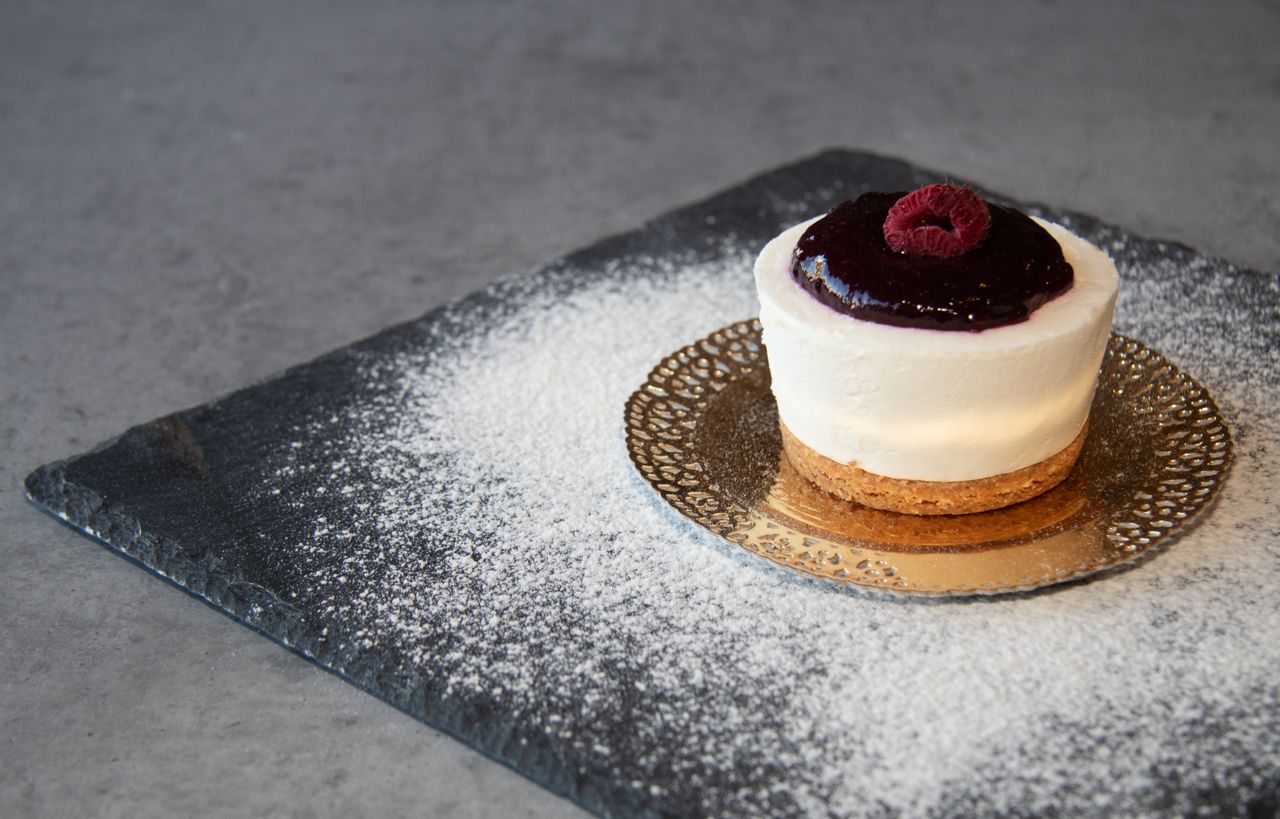
No Bake Cheesecake Bites
Ingredients
Method
- Combine graham cracker crumbs and melted butter in a bowl until the mixture resembles wet sand.
- Press 1 tablespoon (15g) of crust mixture firmly into the bottom of 24 mini muffin cups or silicone molds. Chill while preparing the filling.
- Beat softened cream cheese and sugar on medium speed until smooth and creamy, 2 to 3 minutes. Scrape bowl sides as needed.
- Add vanilla and lemon juice, mix until incorporated.
- In a separate bowl, whip heavy cream to stiff peaks. Gently fold into the cream cheese mixture until uniform.
- Spoon or pipe filling over crusts, filling each about three quarters full. Smooth tops.
- Chill for at least 3 hours or overnight. Top with berries before serving.
Notes
- Do not use cold cream cheese, which leads to lumps.
- Refrigerate in an airtight container up to 5 days, or freeze individually wrapped bites up to 1 month.
Ingredient Science
Cream cheese’s casein proteins and fats create a rich, set texture when combined with sugar and chilled. Heavy cream incorporates air for lightness, while graham cracker crumbs form a stable, buttery crust when mixed with melted butter. Lemon juice provides acid that brightens flavor and helps proteins coagulate slightly for better structure.
Ingredients (makes 24 bites):
- 1 ½ cups (150g) graham cracker crumbs
- 6 tablespoons (85g) unsalted butter, melted
- 16 oz (450g) full-fat cream cheese, softened
- ½ cup (100g) granulated sugar
- 1 teaspoon vanilla extract
- 2 tablespoons (30ml) fresh lemon juice
- ½ cup (120ml) heavy whipping cream
- Optional topping: 1 cup (150g) fresh berries
Step-by-Step Instructions
- Combine graham cracker crumbs and melted butter in a bowl until the mixture resembles wet sand.
- Press 1 tablespoon (15g) of crust mixture firmly into the bottom of 24 mini muffin cups or silicone molds. Chill while preparing filling.
- Beat softened cream cheese and sugar on medium speed until smooth and creamy (2-3 minutes). Scrape bowl sides as needed.
- Add vanilla and lemon juice; mix until incorporated.
- In a separate bowl, whip heavy cream to stiff peaks. Gently fold into the cream cheese mixture until uniform.
- Spoon or pipe filling over crusts, filling each about ¾ full. Smooth tops.
- Chill for at least 3 hours or overnight. Top with berries before serving.
Prep time: 20 minutes. Chill time: 3+ hours.
Variations
Create no bake dessert cups for parties by layering in small jars. Add fruit purees (strawberry or mango) for color and flavor. For lighter versions, incorporate Greek yogurt to boost protein in healthy no bake summer snacks.
Storage Tips
Refrigerate in an airtight container up to 5 days. Freeze individually wrapped bites up to 1 month; thaw overnight in the fridge.
Common Mistakes to Avoid
Do not use cold cream cheese, which leads to lumps. Over-whipping cream can cause graininess—stop at stiff peaks. Pack crust too loosely and it will crumble.
Fresh Fruit Parfaits: Light and Refreshing
These layered parfaits highlight seasonal produce as one of the easiest no bake summer treats for kids and adults alike. It is a great pick from this list of no bake dessert recipes for beginners since it needs no cooking skills at all.

Fresh Fruit Parfaits
Ingredients
Method
- Wash and cut fruit into bite sized pieces. Pat dry gently.
- In a small bowl, whisk together yogurt, honey, and vanilla until smooth.
- Begin layering in clear glasses or jars, starting with 2 to 3 tablespoons, about 40g, of yogurt mixture.
- Add a layer of mixed fruit, about one third cup or 50g.
- Repeat layers, ending with fruit on top. Sprinkle with coconut or granola if using.
- Chill for 30 minutes to allow flavors to meld.
Notes
- Avoid overly ripe fruit that becomes mushy.
- Assembled parfaits keep in the refrigerator up to 2 days. Store fruit and yogurt separately for up to 4 days for best freshness.
Ingredient Science
Fresh fruit contributes natural sugars, acids, and water content that release juices when mixed with honey or yogurt, creating a light syrup. Yogurt’s live cultures and proteins provide creaminess and tang, while coconut milk adds healthy fats that remain stable when chilled. Honey acts as a natural preservative and sweetener.
Ingredients (serves 6):
- 4 cups (600g) mixed fresh fruit (berries, mango, kiwi, pineapple), chopped
- 2 cups (480g) plain Greek yogurt or coconut yogurt
- 3 tablespoons (45ml) honey or maple syrup
- 1 teaspoon vanilla extract
- ½ cup (40g) shredded coconut, toasted (optional)
- ½ cup (60g) granola (optional for crunch)
Step-by-Step Instructions
- Prepare fruit by washing and cutting into bite-sized pieces. Pat dry gently.
- In a small bowl, whisk together yogurt, honey, and vanilla until smooth.
- Begin layering in clear glasses or jars: start with 2-3 tablespoons (about 40g) yogurt mixture.
- Add a layer of mixed fruit (about ⅓ cup or 50g).
- Repeat layers, ending with fruit on top. Sprinkle with coconut or granola if using.
- Chill for 30 minutes to allow flavors to meld.
Prep time: 10 minutes. Chill time: 30 minutes.
Variations
For make ahead summer desserts fridge, prepare components separately and assemble just before serving. Use seasonal fruits for tropical or berry-focused versions. Add a layer of chia pudding for extra nutrition in healthy no bake summer snacks.
Storage Tips
Assembled parfaits keep in the refrigerator up to 2 days. Store cut fruit and yogurt separately for up to 4 days to maintain freshness and texture.
Common Mistakes to Avoid
Avoid overly ripe fruit that becomes mushy. Do not skip patting fruit dry, as excess moisture dilutes layers. Over-sweeten cautiously—taste as you mix.
Frozen Banana Bites: Fun and Kid-Approved
These bite-sized frozen treats transform simple bananas into quick 5 minute no bake dessert ideas. This treat is often requested in no bake dessert recipes for beginners because kids can help with every step.
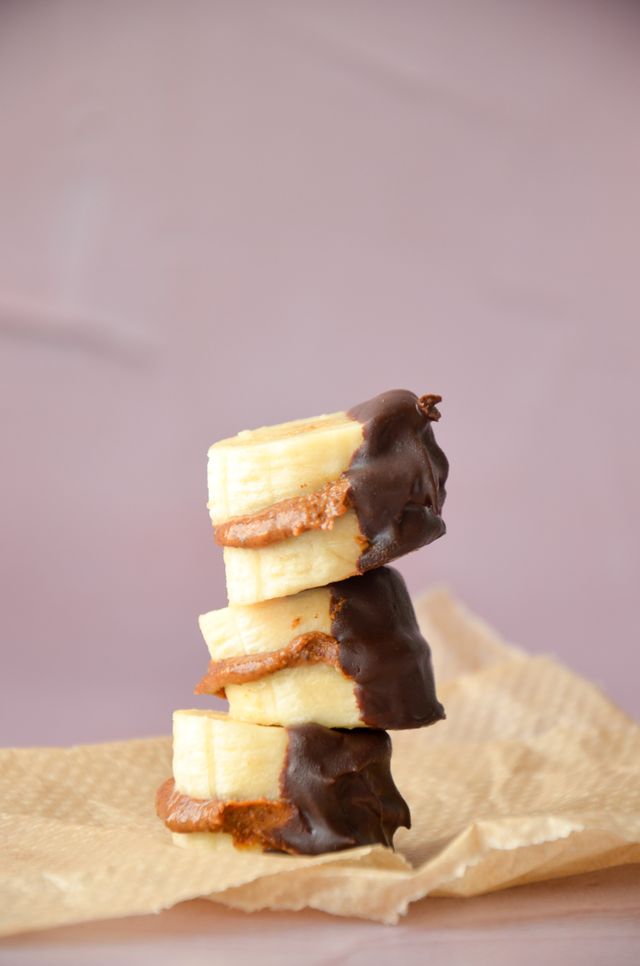
Frozen Banana Bites
Ingredients
Method
- Peel and slice bananas into half inch (1.25cm) rounds. Place on a parchment lined baking sheet.
- Freeze slices for 30 minutes until firm.
- Melt chocolate chips with coconut oil in the microwave in 20 second bursts, stirring until smooth.
- Dip each frozen banana slice halfway into melted chocolate using a fork or toothpick. Allow excess to drip off.
- Roll or sprinkle immediately with toppings.
- Return to the sheet and freeze for 1 hour until fully set.
Notes
- Work quickly with frozen bananas to prevent melting.
- Store in freezer bags or airtight containers up to 2 months. Let sit at room temperature for 2 to 3 minutes before eating.
Ingredient Science
Bananas contain starches that convert to sugars and freeze well, creating a creamy ice-cream-like texture. Chocolate’s cocoa butter snaps when frozen, while yogurt or nut butters add protein and healthy fats that prevent complete hardening. Toppings adhere best to slightly tacky surfaces.
Ingredients (makes about 24 bites):
- 4 medium ripe bananas (about 500g total)
- 1 ½ cups (270g) semi-sweet or dark chocolate chips
- 2 tablespoons (30ml) coconut oil
- ½ cup (60g) chopped nuts, sprinkles, or shredded coconut for rolling
- Optional: 1 cup (240g) Greek yogurt for dipping
Step-by-Step Instructions
- Peel and slice bananas into ½-inch (1.25cm) rounds. Place on a parchment-lined baking sheet.
- Freeze slices for 30 minutes until firm.
- Melt chocolate chips with coconut oil in microwave in 20-second bursts, stirring until smooth.
- Dip each frozen banana slice halfway into melted chocolate using a fork or toothpick. Allow excess to drip off.
- Roll or sprinkle immediately with toppings.
- Return to the sheet and freeze for 1 hour until fully set.
- For yogurt version: dip in yogurt first, freeze briefly, then add chocolate drizzle.
Prep time: 10 minutes active. Freeze time: 1+ hour.
Variations
Create tropical versions with mango or strawberry slices. Use white chocolate for variety in cold desserts for summer parties. Add peanut butter drizzle for a take on classic combinations.
Storage Tips
Store in freezer bags or airtight containers up to 2 months. Let sit at room temperature for 2-3 minutes before eating for optimal texture.
Common Mistakes to Avoid
Work quickly with frozen bananas to prevent melting. Use ripe but not overripe bananas for best flavor and texture. Avoid thick chocolate coating that cracks excessively—coconut oil helps thin it.
Edible Cookie Dough Balls: Safe and Indulgent
These no-egg cookie dough balls provide safe indulgence as one of the top quick chill desserts no oven.This is another favorite among no bake dessert recipes for beginners since the dough comes together in minutes.
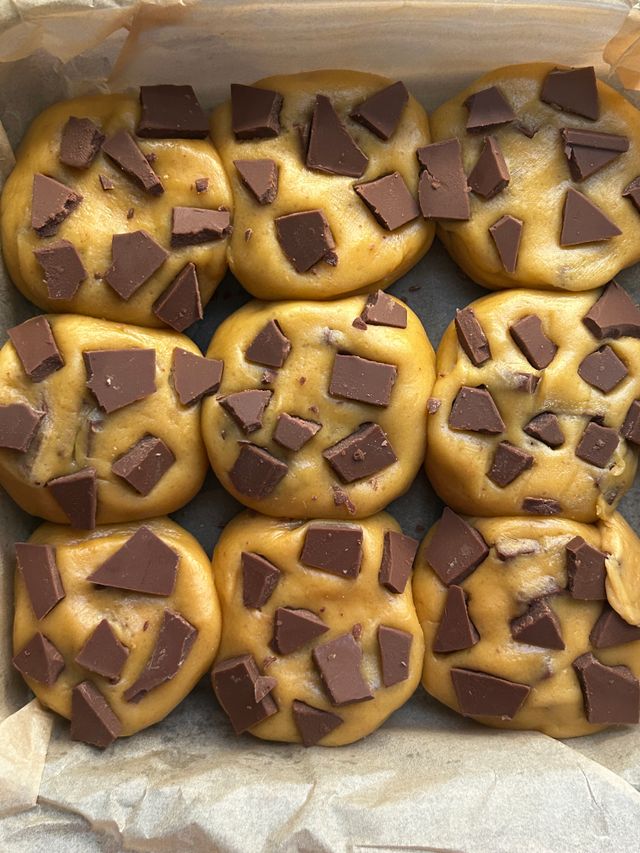
Edible Cookie Dough Balls
Ingredients
Method
- Heat treat flour by spreading it on a baking sheet and baking at 350°F (175°C) for 5 minutes. Skip this step if using store bought heat treated flour. Cool completely.
- Cream softened butter and both sugars until light and fluffy, 2 to 3 minutes.
- Mix in vanilla and salt.
- Gradually add heat treated flour until combined. Add milk 1 tablespoon at a time until the dough reaches cookie dough consistency.
- Fold in chocolate chips.
- Roll into 1 inch (2.5cm) balls, about 20g each.
- Chill for 30 minutes until firm.
Notes
- Skip raw flour to ensure safety.
- Refrigerate in airtight containers up to 1 week, or freeze up to 3 months.
Ingredient Science
Heat-treated flour eliminates bacteria concerns, while brown sugar’s molasses content adds moisture and chew. Butter and chocolate chips contribute fat that solidifies when chilled. Vanilla enhances overall flavor perception.
Ingredients (makes 20-24 balls):
- 1 cup (125g) all-purpose flour, heat-treated
- ½ cup (115g) unsalted butter, softened
- ½ cup (100g) brown sugar, packed
- ¼ cup (50g) granulated sugar
- 1 teaspoon vanilla extract
- ½ teaspoon salt
- 1 cup (180g) mini chocolate chips
- 2-3 tablespoons (30-45ml) milk (as needed)
Step-by-Step Instructions
- Heat-treat flour: spread on a baking sheet and bake at 350°F (175°C) for 5 minutes (optional if using store-bought treated flour). Cool completely.
- Cream softened butter and both sugars until light and fluffy (2-3 minutes).
- Mix in vanilla and salt.
- Gradually add heat-treated flour until combined. Add milk 1 tablespoon at a time until dough reaches cookie dough consistency.
- Fold in chocolate chips.
- Roll into 1-inch (2.5cm) balls (about 20g each).
- Chill for 30 minutes until firm.
Prep time: 15 minutes. Chill time: 30 minutes.
Variations
Incorporate peanut butter or oats for texture. Use dairy-free butter and chips for allergen-friendly options. Roll in crushed cookies or nuts for no bake dessert cups for parties.
Storage Tips
Refrigerate in airtight containers up to 1 week or freeze up to 3 months. Thaw in fridge or enjoy straight from freezer.
Common Mistakes to Avoid
Skip raw flour to ensure safety. Do not over-add milk, which makes dough too sticky. Chill before rolling for easier handling.
Additional Tips for Success with No Bake Dessert Recipes for Beginners
Mastering no bake dessert recipes for beginners involves understanding temperature control and ingredient quality. Use room-temperature dairy for smooth mixing and full-fat versions for best texture. Precise measurements matter—use a kitchen scale for accuracy in metric or leveled US cups.
For make ahead summer desserts fridge, prepare components in advance and assemble closer to serving. These recipes scale easily for crowds, making them ideal cold desserts for summer parties. Following these tips will help every batch of no bake dessert recipes for beginners turn out right every time.
5 FAQs About No Bake Dessert Recipes for Beginners
1. Are no bake desserts safe without cooking?
Yes. Recipes use pasteurized or heat-treated ingredients and rely on refrigeration for safety and setting. Store properly and consume within recommended times.
2. How long do these no bake desserts last?
Most keep 3-7 days in the refrigerator or 1-2 months frozen. Fruit-based options have shorter fridge life.
3. Can I make these ahead for parties?
Absolutely. Most qualify as excellent make ahead summer desserts fridge. Prepare 1-2 days in advance and add fresh toppings before serving. This makes them ideal no bake dessert recipes for beginners for anyone hosting a party.
4. What substitutions work for dietary needs?
Use gluten-free flour, dairy-free alternatives, or sugar substitutes. Check labels for allergies. Many recipes adapt easily to healthy no bake summer snacks.
5. Do kids enjoy these desserts?
Yes. Easy no bake summer treats for kids like banana bites and cookie dough balls encourage participation in simple steps and deliver familiar flavors.
These no bake dessert recipes for beginners prove that impressive results require neither advanced skills nor an oven. Experiment with the provided variations and enjoy cool, delicious creations all summer long with quick chill desserts no oven and frozen dessert recipes no bake at your fingertips.