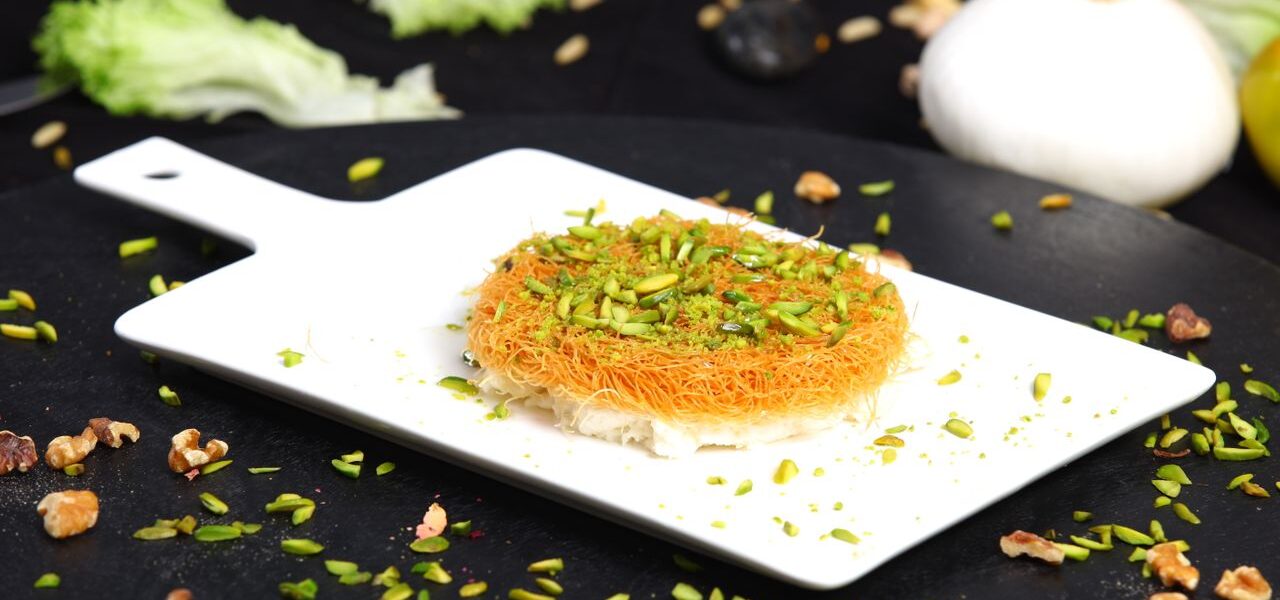
Discover this easy kunafa recipe for beginners with step-by-step instructions for homemade knafeh with mozzarella. Learn to create a golden crispy exterior, gooey cheese filling, and fragrant middle eastern kunafa syrup recipe. Perfect for chocolate kunafa dessert easy twists and more variations.
Table of Contents
Easy Kunafa Recipe for Beginners
Kunafa, also known as knafeh or kanafeh, stands as one of the most beloved Middle Eastern desserts. This easy kunafa recipe for beginners delivers a delightful contrast of textures: a simple crispy kataifi dessert on the outside paired with a warm, stretchy cheese center soaked in aromatic syrup. Whether preparing homemade knafeh with mozzarella or exploring kunafa with cheese and pistachios, this guide provides everything needed for success in a Western kitchen.
The recipe uses readily available ingredients and offers both oven and stovetop knafeh without oven options. Clear measurements in US and metric units, along with tips for golden crispy kunafa dough, ensure reliable results every time. This approachable method transforms basic pantry staples into an impressive arabic cheese pastry kunafa variations centerpiece suitable for gatherings or quiet evenings. This easy kunafa recipe for beginners is the only guide you will ever need.

Ingredients
Method
- Make Syrup: In a saucepan, combine sugar, water, and lemon juice. Boil then simmer 10-12 minutes until slightly thickened. Remove from heat and add rose & orange blossom water. Keep warm.
- Prepare Dough: Loosen kataifi strands in a bowl. Pour melted butter/ghee over it and toss until every strand is well coated.
- Cheese Filling: Mix shredded mozzarella, ricotta, and salt. Set aside.
- Assemble:
- Preheat oven to 375°F (190°C).
- Grease a 9×13-inch (23x33cm) pan.
- Press half the buttered kataifi into the bottom.
- Spread cheese filling evenly.
- Top with remaining kataifi and press gently.
- Bake: Bake 25-35 minutes until deep golden and crispy. (Optional: broil last 2-3 minutes for extra color.)
- Finish: Pour warm syrup generously over hot kunafa. Let rest 5-10 minutes. Garnish with chopped pistachios. Serve warm.
Understanding Kunafa: Origins and Appeal
Kunafa originated in the Middle East, with roots tracing back centuries across regions like Palestine, Lebanon, Egypt, and Turkey. At its core, it features shredded kataifi dough (thin, vermicelli-like pastry threads), a rich filling, and a fragrant sugar syrup. The magic lies in the contrast: shatteringly crisp pastry against a soft, melty interior.
For beginners, the appeal comes from its forgiving nature once the basic technique is mastered. The dish balances sweetness, saltiness from cheese, and floral notes from syrup, creating a sophisticated yet comforting dessert. This easy kunafa recipe for beginners focuses on accessible substitutions while preserving authentic flavors. That is exactly what makes this easy kunafa recipe for beginners so rewarding to learn.
Ingredient Science: Why Each Component Matters
Following this easy kunafa recipe for beginners means understanding what each ingredient does and why it matters for the final result. Understanding the science behind the ingredients elevates this simple crispy kataifi dessert from good to exceptional.
Kataifi Dough (Shredded Phyllo): This delicate, thread-like pastry provides the signature crunch. Composed primarily of flour, water, and starch, it crisps beautifully when coated in fat and exposed to high heat. The thin strands create maximum surface area for browning via the Maillard reaction, developing nutty, toasty flavors. Fresh or properly thawed dough prevents dryness or breakage.
Butter or Ghee: Fat is essential for crispiness. Ghee (clarified butter) or high-quality unsalted butter coats each strand, promoting even browning and moisture resistance. Butter’s water content can lead to steaming instead of crisping, which is why ghee excels for golden crispy kunafa dough tips. The fat also carries flavors and adds richness. Using ghee in this easy kunafa recipe for beginners makes a noticeable difference in final texture.
Cheese Filling: A mix of mozzarella and ricotta (or similar) delivers the iconic stretch and creaminess. Mozzarella provides elasticity through its protein structure, which melts and pulls when heated. Ricotta or cream adds moisture and mild tang. Salting or desalting cheese controls overall sweetness. High-moisture cheeses melt smoothly without separating. Choosing the right cheese is essential when following this easy kunafa recipe for beginners.
Sugar Syrup (Middle Eastern Kunafa Syrup Recipe): Simple syrup made with sugar, water, lemon juice, and floral waters (rose or orange blossom) soaks the pastry. Lemon juice inverts sugars to prevent crystallization, while floral waters add aromatic complexity without overpowering sweetness. Hot syrup on hot pastry ensures proper absorption for a moist yet non-soggy result. The syrup ratio in this easy kunafa recipe for beginners is carefully balanced for best results.
Pistachios and Garnishes: These add crunch, color, and nutty flavor that complements the sweetness. Toasting enhances their oils and aroma.
Optional Cream: In cream filled kunafa recipe styles, a cornstarch-thickened pudding (ashta) introduces silky texture through starch gelatinization.
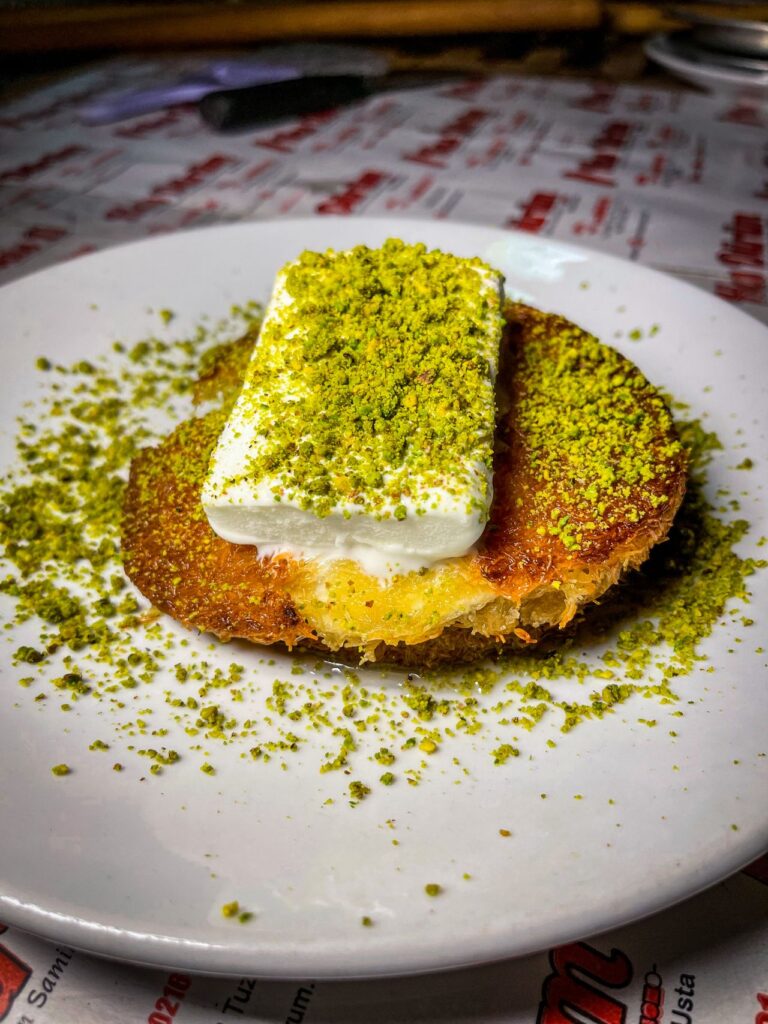
Ingredients (Serves 8-10)
For the Sugar Syrup (Middle Eastern Kunafa Syrup Recipe)
- 2 ½ cups (500g) granulated sugar
- 1 ¼ cups (300ml) water
- 1 tablespoon (15ml) fresh lemon juice
- 1 tablespoon (15ml) rose water
- 1 tablespoon (15ml) orange blossom water (optional but recommended)
For the Kunafa Base
- 1 pound (454g) kataifi dough, thawed if frozen
- 1 cup (226g) unsalted butter or ghee, melted (plus extra for greasing)
For the Cheese Filling (Homemade Knafeh with Mozzarella)
- 14 oz (400g) low-moisture mozzarella cheese, shredded
- 7 oz (200g) ricotta cheese or additional mozzarella
- ¼ teaspoon salt (if using unsalted cheese)
For Garnish
- ½ cup (60g) pistachios, finely chopped
- Optional: edible rose petals or extra pistachios
For Cream Filled Kunafa Recipe Variation
- 2 cups (480ml) whole milk
- ¼ cup (50g) granulated sugar
- 3 tablespoons (24g) cornstarch
- 1 teaspoon (5ml) rose water or orange blossom water
Equipment Needed
- 9×13-inch (23x33cm) baking pan or round 10-12 inch (25-30cm) pan
- Large mixing bowl
- Saucepan for syrup
- Pastry brush
- Sharp knife for serving
- Oven or stovetop skillet for alternative method
Where to Buy Kataifi Dough
This easy kunafa recipe for beginners becomes even more accessible once you know exactly where to find kataifi dough. Many first-time makers feel stuck at this step but it is actually easier to source than expected.
Middle Eastern grocery stores are the most reliable option and usually carry kataifi in the freezer section. In larger cities across the US, UK, Canada, and Australia, these stores are fairly easy to find. International grocery stores and world food aisles in bigger supermarkets like Walmart, Whole Foods, or Tesco often stock it as well, especially in areas with diverse populations.
Online shopping is another excellent option. Amazon and other online retailers carry frozen kataifi dough with delivery to most locations. Simply search for kataifi dough or shredded phyllo dough and several brands will appear.
Pakistani and Indian grocery stores sometimes carry kataifi or a similar fine vermicelli pastry that works reasonably well as a substitute. When buying, always check that the dough is pliable and not dried out. Store unopened in the freezer for up to 3 months and thaw overnight in the refrigerator before use. Getting the dough right is the first major step in this easy kunafa recipe for beginners. Once kataifi is in hand, completing this easy kunafa recipe for beginners becomes straightforward.
Step-by-Step Instructions for Easy Kunafa Recipe for Beginners
1. Prepare the Sugar Syrup
Combine sugar, water, and lemon juice in a saucepan over medium heat. Stir until sugar dissolves, then bring to a boil. Reduce heat and simmer for 10-12 minutes until slightly thickened (it should coat the back of a spoon but remain pourable). Remove from heat, stir in rose water and orange blossom water, and set aside to cool slightly. This middle eastern kunafa syrup recipe can be made ahead and stored in the refrigerator. This syrup step in this easy kunafa recipe for beginners can be done a full day ahead.
2. Prepare the Kataifi Dough
Place the thawed kataifi dough in a large bowl. Gently separate the strands with fingers to loosen. Pour the melted butter or ghee over the dough. Toss thoroughly until every strand is evenly coated. This step is key for golden crispy kunafa dough tips—ensure full coverage without breaking strands excessively. Proper butter coating at this stage sets this easy kunafa recipe for beginners up for success.
3. Prepare the Cheese Filling
Mix shredded mozzarella, ricotta (if using), and salt in a bowl. For extra creaminess in homemade knafeh with mozzarella, gently press out excess moisture from cheeses using a clean towel. The filling should be shreddable and slightly tacky.
Optional Cream Layer (for Cream Filled Kunafa Recipe): In a saucepan, whisk milk, sugar, and cornstarch until smooth. Cook over medium heat, stirring constantly, until thickened (about 5-7 minutes). Remove from heat and add floral water. Cool before using.
4. Assemble the Kunafa
Preheat oven to 375°F (190°C) if baking. Generously grease the pan with butter or ghee.
- Spread half the buttered kataifi mixture evenly in the pan, pressing lightly to form a firm base.
- Add the cheese filling in an even layer, leaving a small border around edges.
- For cream filled version, spread cooled cream over or mixed with cheese.
- Top with remaining kataifi, pressing gently into an even layer.
Layering correctly is what gives this easy kunafa recipe for beginners its signature look and texture.
5. Bake or Cook
Oven Method (Recommended for Beginners): Bake for 25-35 minutes until the top turns deep golden brown and crispy. For extra color, broil for the last 2-3 minutes, watching closely.
Stovetop Knafeh Without Oven: Use a large, heavy skillet over medium-low heat. Cook covered for 15-20 minutes, flipping carefully halfway if possible, until both sides achieve golden crispiness. This method works well for smaller batches.
Remove from heat. Immediately pour warm syrup evenly over the hot kunafa. The sizzle indicates proper absorption. Let rest 5-10 minutes. Watching the color carefully during baking is a key skill in this easy kunafa recipe for beginners.
6. Serve
Sprinkle generously with chopped pistachios. Cut into squares or wedges and serve warm for the best gooey texture in this kunafa with cheese and pistachios.
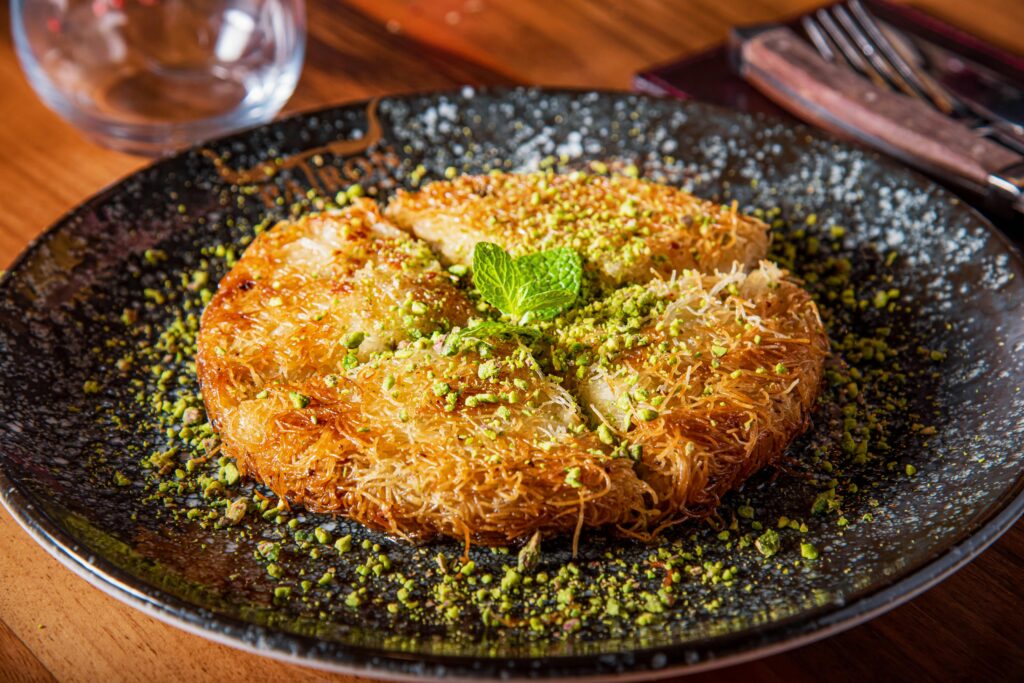
Golden Crispy Kunafa Dough Tips
Achieving the perfect crisp relies on technique:
- Fully coat strands with fat to create a moisture barrier.
- Press layers firmly but not compactly to allow steam escape.
- Bake at consistent high heat for even browning.
- Apply syrup while both pastry and syrup are hot.
- Avoid overcrowding or excess moisture in fillings.
These practices ensure the simple crispy kataifi dessert shines with restaurant-quality texture. Keeping these tips in mind while following this easy kunafa recipe for beginners will help achieve bakery quality results every single time at home.
Delicious Variations
This easy kunafa recipe for beginners serves as an excellent base for arabic cheese pastry kunafa variations.
Chocolate Kunafa Dessert Easy: Drizzle melted dark or milk chocolate (about 4-6 oz / 115-170g) over the baked kunafa before syrup or as a topping. The chocolate complements the cheese for a modern fusion twist. This chocolate twist on this easy kunafa recipe for beginners is always a crowd pleaser.
Dubai Style Kunafa at Home: Incorporate pistachio cream or spread (mix ground pistachios with cream or ashta) in the filling. Add toasted nuts generously for extra crunch and luxurious flavor. The Dubai style version of this easy kunafa recipe for beginners feels luxurious and impressive.
Cream Filled Kunafa Recipe: Layer the cornstarch pudding generously for a richer, smoother interior. This version appeals particularly to those preferring less stretchy cheese.
Mini Individual Portions: Bake in muffin tins for 15-20 minutes. Ideal for parties and portion control.
Savory Twist (Less Traditional): Experiment with mild cheeses and herbs, though sweet remains the classic approach.
Experiment confidently—the base structure of this easy kunafa recipe for beginners supports creativity while maintaining balance.
Kunafa vs Other Middle Eastern Desserts: A Quick Comparison
Unlike many other sweets, this easy kunafa recipe for beginners stands out for its unique combination of crispy texture and warm gooey filling that no other dessert quite replicates. Understanding how kunafa compares to other popular Middle Eastern desserts helps appreciate what makes it so special and why it remains a crowd favorite at every gathering.
Kunafa: Made with kataifi shredded dough, filled with cheese or cream, crispy outside and soft inside, served warm with rose water syrup and pistachios on top.
Baklava: Made with layered phyllo pastry, filled with chopped nuts, texture is flaky and crunchy throughout, served at room temperature with honey or sugar syrup.
Basbousa: Made with semolina cake base, plain or with cream filling, texture is dense and moist throughout, served at room temperature soaked in simple syrup.
Maamoul: Made with shortbread style dough, filled with dates or nuts, texture is crumbly and soft, served at room temperature dusted with powdered sugar.
Luqaimat: Small fried dough balls with no filling, texture is crispy outside and fluffy inside, drizzled with date syrup or honey and sesame seeds on top.
Each dessert has its own charm but kunafa wins for those who love the contrast of hot crispy pastry with a melting cheese center. It is also one of the few Middle Eastern desserts that is best enjoyed warm straight from the pan which makes it feel extra special and indulgent.
Storage Tips
Kunafa tastes best fresh and warm. Store leftovers in an airtight container in the refrigerator for up to 3 days. Reheat in a 350°F (175°C) oven for 10-15 minutes to restore crispiness. Avoid microwaving, as it softens the kataifi.
For longer storage, freeze unbaked assembled kunafa (without syrup) for up to 1 month. Thaw overnight in the refrigerator and bake fresh. Cooked kunafa freezes less successfully due to texture changes in the pastry.
How to Serve Kunafa at Parties and Gatherings
This easy kunafa recipe for beginners is absolutely perfect for large gatherings, Eid celebrations, Ramadan iftars, and dinner parties where you want to impress without spending hours in the kitchen.
For serving a crowd, bake kunafa in the largest tray available. A 9×13 inch pan comfortably serves 10-12 people when cut into generous squares. For parties with more guests, prepare two trays back to back since kunafa reheats well in the oven.
The best way to cut kunafa is while it is still warm. Use a sharp knife and cut in a grid pattern for squares or diagonal cuts for diamond shapes which look more elegant on a serving platter. Wipe the knife between cuts for clean edges.
For a beautiful presentation, transfer kunafa onto a large serving platter and garnish with extra pistachios and a few edible rose petals. A light extra drizzle of syrup right before serving keeps it looking fresh and glossy.
Pairing suggestions work really well here. Serve kunafa alongside Arabic qahwa (cardamom coffee) or mint tea for a traditional experience. For a more modern twist, a small scoop of vanilla ice cream placed on a warm piece of kunafa creates an incredible hot and cold contrast that guests absolutely love.
For individual party servings, bake mini kunafa cups in a muffin tin. Each guest gets their own perfectly portioned piece which also makes cleanup much easier and presentation very neat.
Common Mistakes to Avoid
- Skipping Even Butter Coating: Leads to patchy crispiness or dry spots. Take time to toss thoroughly.
- Cold Syrup on Hot Pastry (or Vice Versa): Prevents proper soaking. Keep both warm.
- Overfilling with Cheese: Causes overflow or sogginess. Maintain a balanced layer.
- Using Wet Cheese: Drains excess moisture to prevent steaming the dough.
- Underbaking: Results in chewy rather than crispy texture. Aim for deep golden color.
- Over-soaking: Apply syrup generously but monitor for excess pooling.
- Incorrect Thawing: Frozen kataifi requires full thawing in the refrigerator to avoid breakage.
Attention to these details guarantees success with homemade knafeh with mozzarella and other styles.
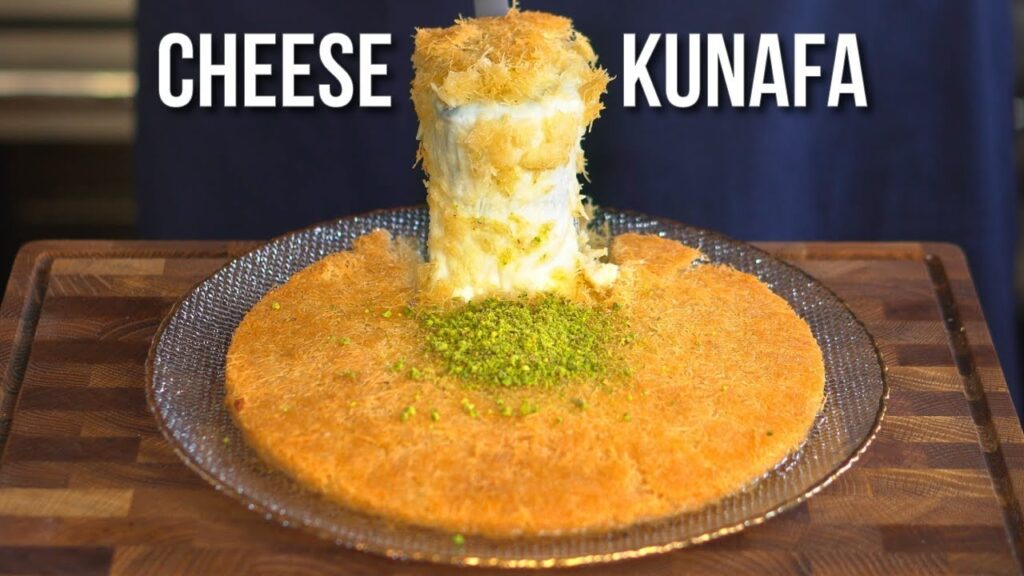
5 FAQs
1. Can I make this easy kunafa recipe for beginners without an oven?
Yes. The stovetop knafeh without oven method uses a skillet on medium-low heat. It requires careful flipping but produces excellent results for smaller pans.
2. What cheese works best for homemade knafeh with mozzarella?
Low-moisture mozzarella provides excellent stretch. Combine with ricotta for creaminess. Avoid pre-shredded cheeses with anti-caking agents.
3. How do I prevent my simple crispy kataifi dessert from becoming soggy?
Coat dough generously with ghee, bake to deep golden, and apply hot syrup to hot pastry. Serve promptly after resting.
4. Is rose water necessary in the middle eastern kunafa syrup recipe?
It enhances authentic flavor, but start with less if new to floral waters. Orange blossom offers a citrusy alternative.
5. How can I adapt for chocolate kunafa dessert easy or Dubai style kunafa at home? Add melted chocolate drizzle post-baking for chocolate version. Incorporate pistachio cream or extra nuts for Dubai-inspired richness.
Conclusion
This easy kunafa recipe for beginners opens the door to a world of Middle Eastern desserts with minimal stress and maximum reward. From mastering golden crispy kunafa dough tips to exploring cream filled kunafa recipe and kunafa with cheese and pistachios, the foundations here support endless creativity. The balance of crisp pastry, melty filling, and fragrant syrup creates an unforgettable experience that impresses family and guests alike.
Gather ingredients, follow the clear steps, and enjoy the process of creating this timeless treat. The combination of textures and flavors makes kunafa a dessert worth mastering. Happy baking! That unique warmth is what makes this easy kunafa recipe for beginners truly unforgettable